Monday, August 11, 2008

Coin door and front end

I installed the one final piece that the cabinet was missing: the coin door. Now I can charge people for playing! But they can just take their quarters back, or press the free coin-up button next to the start button. The coin slots light up because I wired some bulbs to the computer's power supply.

Since the coin 1 and 2 slots are wired up to press 5 and 6 on the keyboard, I got an idea - a keyboard where you have to pay a quarter for every keypress. If you think text messaging shorthand is annoying, just wait until every letter costs a quarter. There'll be a shorthand renaissance.

I had an arcade cabinet and no way to easily choose what game to play. And I didn't like any existing frontend software. No fear! Computer programming skills to the rescue! Exclamation marks! I designed and programmed this game picking frontend (this list of games is clearly not complete, but it was good enough for testing).

Here is the frontend running on the machine. The computer boots right up to the following screen:

So what don't I like about existing frontend software?

  • Not configurable enough.
  • Takes too long to boot up.
  • Too slow to move around the UI.
  • Too fancy.
  • Too not made by me.

How did I fix those problems?

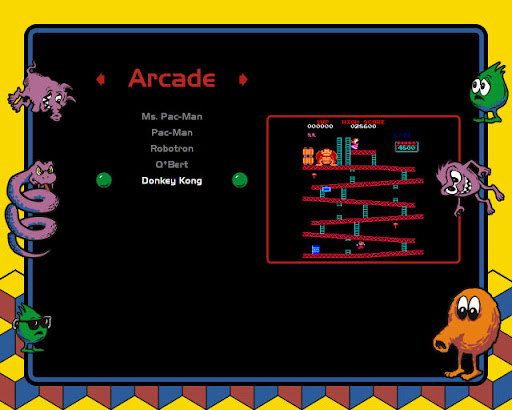
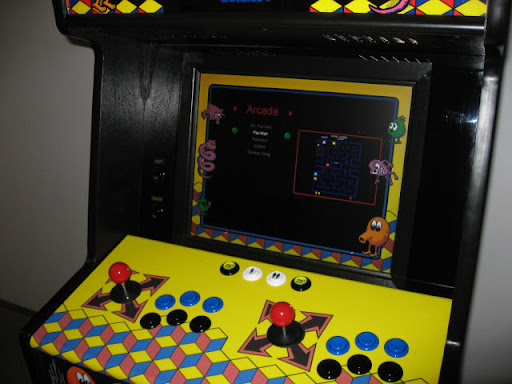
  • I made the ultimate configurable system. Nothing is set in stone. The list of emulators and games are read from an XML file and parsed into objects. Those objects are provided to an HTML page to render them however it wants. When the user presses a key or moves the joystick, a script function in the HTML page is called. The script can handle the event however it wants. The list of system commands to run before and after a game are in the XML file, and any game can easily modify them.
  • Boot time is practically instant, the HTML page I made loads really fast. Since I wrote my own hosting window for MSHTML, I don't have to wait for a web browser to load.
  • In my HTML page, I didn't make any animations or sounds or anything to annoy me.

Tuesday, July 29, 2008

Game on

I got the smart power strip and hooked everything up to a single button on the back panel. Now it's game time (hmm, maybe I should've played Q*bert first, but it'll definitely be within the first eighty games played).

And there is a keyboard drawer:

Gotta play Mario. To the left of the monitor are two buttons labeled "Quit" and "Pause". That's so noobs can use the machine without having to hold their hand.

Sunday, July 27, 2008

Cabinet about done

The pictures below are the completed cabinet shell except for the acrylic sheet in front of the monitor and the coin door (which has been ordered).
Then a fun part comes - not the most fun since I can't play games yet - but setting up the computer will be a little fun. I've tried a couple front ends to let me switch between games and emulators, but all they do is make me want to write my own front end. Then I'll have the ultimate flexibility, I don't care about graphical flashiness. Anyway... picture time:

LCD mount

The end is near. Doesn't mean I'm getting closer to it though. But I see it.

The LCD monitor is ready to be mounted. I made a custom bezel for it out of hemlock moulding. See below:

Since the LCD isn't magical and can't float in a fixed position in space, I need to mount it to the cabinet somehow. That somehow is just plywood that's attached to the back of the LCD using the standard mounting holes. I put some screws through it at 100mm spacing, and that's shown below:

The board is as wide as the inside of the cabinet (23") so it'll be easy to mount it somehow.

Thursday, July 24, 2008

Keyboard hack/admin buttons

Now I want to have separate buttons for quitting and pausing games. This would've been possible with combo button presses, but the basic controls should be obvious to a moron playing on the machine for the first time. All of the eight buttons were already taken on each joystick, so how can I add a few more buttons? The answer is to bust open an old keyboard and connect buttons to the circuit board. This is very cheap, almost free if I didn't have to buy a soldering iron and solder and wire. But even with that junk, it's still half the price of buying a dedicated key encoder.

In the picture below, the middle green board is from an old Microsoft natural elite keyboard. The soldering points are in a logical location and it's easy to solder new wires to them. Some newer keyboards (like a USB keyboard that I opened) have such a tiny encoder chip on the board that there are no solder points (everything is covered up).

At the maximum, I want to add five buttons: Escape, pause, speed-up, coin 1 and coin 2 (actually I just want the coin buttons to be available for the inevitable addition of a coin door). For this keyboard encoder, it requires nine wires for those five buttons. I don't need every key combination, which would've required twenty-four wires and a couple more wiring blocks.

Monday, July 21, 2008

Marquee test

I wanted to see what the marquee and control panel looked like when they were attached. Nobody stopped me from doing it, so I took a picture:

Hmm, looks like the yellow sides are splotchy. Screw it, I'm not put on any more coats. Maybe it'll even out when it dries and when the acrylic clearcoat is added. There's going to be big stickers on the sides anyway to distract attention.

The t-molding is going to make the cabinet look quite nice. That's probably the next step after the front door is attached.

Assembly - begin!

After about three weekends of work, I finally had something that looked like an arcade cabinet.

Here we have the sides, base, middle, and top screwed together. You can also see the fan at the back of the base. It's just a computer case fan. I don't know why it likes computer cases so much.

Then I screwed the speakers to the speaker panel, attached it, and added the flourescent light. I think the front drawer is also added in the following pic, it's kind of hard to see.